An Ode to the Pencil Skirt

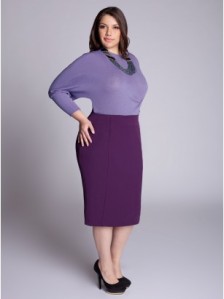
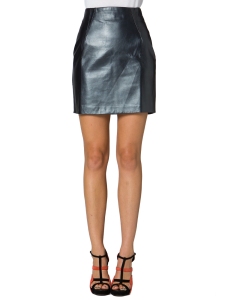
Pencil skirts…love them or hate them, you can’t escape them.  And you should love them – they’re a great addition to any woman’s wardrobe; they suit pretty much any body shape, can be business-like and professional or fun and sexy.

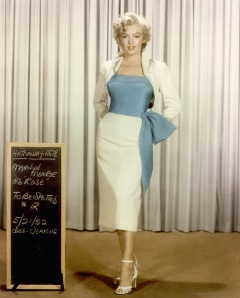
Anyway, for the longest time I was very iffy about wearing pencil skirts and I’m not exactly sure why, especially given their classic place in fashion history.  I mean, who could resist this look?

Marilyn

Classic

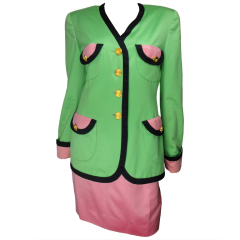
My aversion may have been due to a body image issue (I’ve been funny about my hips since the time the mother of a boy I went out with in High School told me I had child-bearing hips.  Seriously.  I was 17…), but taking some burlesque classes and learning to sew have taught me to love my body the way it is, or it might have been due to my resistance to look like a business-woman…or it could the ever enduring image of 1980s-esque outfits that have put me off…

I know the 80s have made a come-back, but really??

I know the 80s have made a come-back, but really??

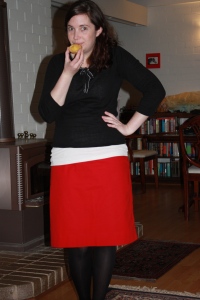
Anyway, since I started sewing I have gradually begun wading into the deep, deep waters of pencil skirtdom, and am now totally and completely in love!  I began with a little flirtation here…

Day 11

Yes, I’m eating.  Yes, it was delicious!

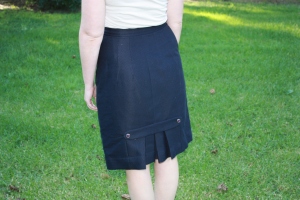
…and another little dalliance there…

The pleats are what makes this skirt awesome

The pleats are what makes this skirt awesome

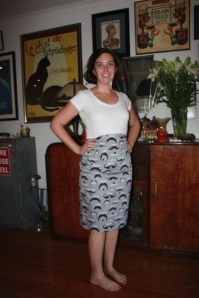
But my full blown affair began with this little beauty:

Pencilly love

Pencilly love

It’s the pencil skirt pattern from Gertie’s New Book for Better Sewing, and while I was initially rather dubious about the ultra (for me, anyway) high waist, I gave it a shot and I’m glad that I did.  Gertie and I apparently share very similar body measurements so I had to make virtually no alterations to the pattern and while I made this with many starts and stops over a couple of weeks if you had a spare afternoon to sew,  you could whip one (or maybe even two) of these up with time for a gin and tonic afterwards before taking your new skirt out for dinner.

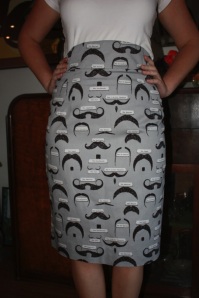
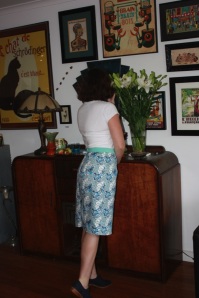
Can you see them?

Can you see them?

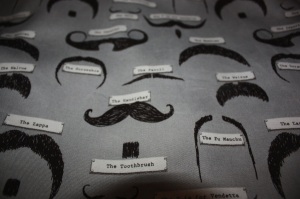
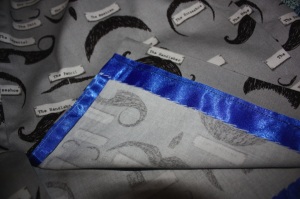
The thing that makes me love this skirt more than I probably should?  The print on the fabric.

Moustaches!!

Moustaches!!

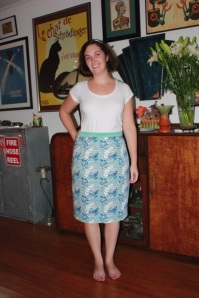
I decided after wearing this out and about for a day that I should make another one, with perhaps some more “sensible” fabric.  I searched my stash, found just enough leftovers from another project for this:

IMG_7457

I changed the waistband to a narrower, straight band for this one, and it completely changes the way the skirt looks.  It looks much more casual and less fitted.  Which is nice for a change, but I still prefer the Moustache Skirt.

Ignore my face...please!

Ignore my face…please!

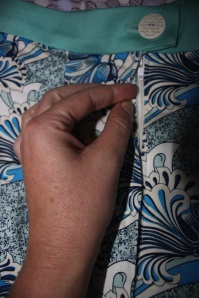
I tried a bunch of different of techniques while making these skirts,  My first lapped zippers!  And I used ribbon to bind the seam edges – both things I can’t believe I haven’t done all this time and can’t wait to employ again.

Lapped zipper

Lapped zipper

Ribbon bound edges and seams

Ribbon bound edges and seams

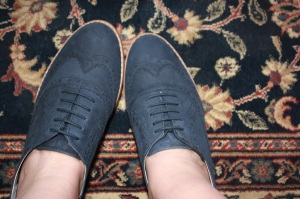
And, just to finish the post off on something pretty, my new shoes!
Bue suede shoes!

Bue suede shoes!


Life in Pictures

Back, once again, after a long hiatus. Rather than trying to jump straight back into the saddle I thought I’d ease my way back into it by just posting a few pics of what’s been keeping me busy. This is just a small sample, and you’ll be seeing a couple of these again when I […]

J’habille ma poupee avec Singer*

Just a quick post today to show you all the wonderful, amazing and gorgeous birthday gift I received earlier this year from Dajarra. My birthday occurred while we were travelling overseas and because you pretty much can’t beat spending a birthday in France, I didn’t expect a present (except maybe a glass or two of champagne…) at all. So I was very surprised when Dajarra ran to me, extremely excited, while we were perusing the goods at a flea market in Cannes claiming that he’d found my birthday gift.  I present…

Singer toy sewing machine

This box, ladies and gentlemen, holds one of the famous Singer Model 20 toy sewing machines. I’m sure you’ve all seen and heard about these, but I’m so excited to own a very nice 1950s French model.

In its natural habitat

Singer began producing these in around 1910 and continued into the 1970s, with a few updates and modifications along the way. I’ve not been able to discover the exact date of mine but have narrowed it down to the 1950s. Click here if you’d like to read more about these beautiful little machines.

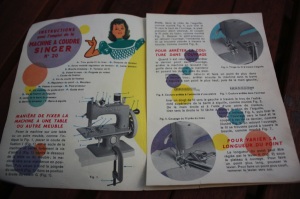
French instructions…if it doesn’t involve ordering a meal, I won’t be able to read it!

My machine, and box, came with all the original instructions and other bits and pieces – except for a sewing pattern for doll clothing, apparently. Currently scanning eBay to get my hands on one!

Gratuitous glamour shot

*Translation: J’habille ma poupee avec Singer = I dress my doll with Singer

How about that time I delved into making menswear…

…and discovered that I actually liked it!  In fact, I can’t wait until my next menswear project.  It all started out with a little experiment where I went from this:

Despite appearances in this pic, it’s not a women’s shirt!

to this:

Yay! Pink flowers!

Dajarra came home from work one day last week looking a bit forlorn so being the caring person that I am, I asked what was wrong. He pointed to the bottom of the shirt he was wearing and showed me a hole.  And next to that hole was a small tear.

The death knell…

Since both the hole and tear were near the edge of the bottom of the shirt, and because it was such a favourite (it was first bought years ago as a fancy going out shirt and then devolved into a work shirt) I thought I could simply chop the rips off and re-hem it, but on closer inspection it looked like it was just one muscle flex away from falling apart completely so I decided to pick the shirt apart to use as pattern pieces to try to make a new one.  I’ve never made a proper shirt before so it was interesting to learn how all the pieces went together and I tried to take as many notes as possible (though I did get completely carried away with the seam ripping at times and forgot to note some important, tricky bits – grrr me!).

Sad, unpicked shirt

Warning!: if you decide to this yourself, beware of unpicking the underarm sections – especially if it was a much loved shirt…ugh!  Because I knew the original shirt fit so well I knew I wouldn’t have to make any alterations to the pattern, except adding a little more to the seam allowances.  I then pinned the old shirt pieces to paper and traced around the edges. I used pins stuck through both the fabric and the paper to mark other details such as button holes, stitching lines, etc.

Making the new pattern

I then marked all these details carefully onto the new pattern pieces…

New pattern

…and got to cutting out the new fabric. Because this was supposed to be only a muslin to see if I could actually put the blighter together I wasn’t too fussy with the fabric I used and went with the largest piece I had that I didn’t mind wasting. I then started to put the shirt together – most of it went together like a dream but some parts (remember how I said I forgot to take notes on some important steps?) took me an age to figure out. It took lots of running to the wardrobe to check out the construction of other shirts to work it out. After Dajarra saw the beginnings of the shirt he immediately declared he loved the fabric and would actually wear the shirt out of the house, so I began to take care with some of the details that I would ordinarily just skip through on a muslin.  Like this:

Amazing cuff break facing!

and this:

Collar

I had so much fun and learned a heap making this shirt and I’m actually immoderately proud of this humble achievement, even though there are definitely a couple of parts that just aren’t right. I’m really looking forward to making another one that’s not made of pink, floral bedsheets.

Voila!

Photo update

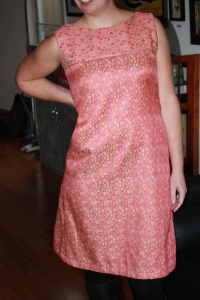
A while Ages ago I posted about a finished project with the promise for a picture of me actually wearing the dress. I finally got around to wearing it the other night and had a couple of pics snapped before we went out. Actually, around 20 photos were taken but only a few were acceptable for internet consumption. The human to alien ratio of me in photos is about 1:5…at best.

Rescued disaster dress

After wearing it for an evening out, I’m sorry I hadn’t worn it earlier…maybe I just needed some time away from it because its rescue operation gave me nightmares. It’s done now though, and it’s given me more enthusiasm for tackling the other horrors that are in my UFO box.

Shiny, shiny dress

The fabric looks mega shiny in these photos, but I don’t think (??) it’s this obvious in real life. I’m going to blame the camera flash. In reality the fabric is gorgeous and soft and yes, a little shiny but it’s much less “cocktail” looking than these photos seem to depict.

Up close and personal

Overall, I’m super happy that I persevered with this – it’s a cute dress, made with fabulous fabric and I got a stack of compliments when I wore it the other night – that’s always a score, right?


Long time, no see!

Wow! It’s been nearly five months since I last posted. But, before you think I’ve just been lazy (which, to be honest is my usual excuse for long blogging breaks) I’ve been a busy little bee. I got back a couple of weeks ago from a wonderful three month long European holiday! We were lucky enough to spend about 6 weeks in France, and the rest of the time was spent wandering around different countries as you can only really do in Europe. Coming from Australia where it takes about four hours to fly to our closest neighbouring country (New Zealand) and at least double that for flying anywhere else, it was such a luxury to be only a couple of hours from any selection of other countries. But enough of that, I have some pictures and a few stories from our trip, related to sewing – of course! – to share.

Because I’m a bit of a history nerd we visited lots of historical sites, and lots of those related to the two world wars. While many of the sites were moving to the extreme, one in particular really touched me; the village of Oradour-sur-Glane, in France. If you don’t know the story, check it out here. But in brief, a company of German SS soldiers destroyed the town in 1944 and murdered nearly 650 of its inhabitants, which was basically everyone. The ruined village was ordered to be maintained in its destroyed state as a permanent memorial and you can still visit it today. Which we did.

Orardour-sur-Glane

All that’s left of the village are ruined buildings and the metal remains of the townspeople’s belongings: bed frames, tools, bicycles and sewing machines. Dozens and dozens of sewing machines – most of them Singer machines.

Indestructible Singer sewing machine

They’re dirty and rusted, but they’re all still unmistakably sewing machines and they look like they just need a bit of love and they’d start right up and start sewing again! And nearly every dwelling had at least one which serves as a reminder of just how ubiquitous they were and how important sewing and the creation of one’s own garments and household items was.

Another one

I counted well over 50 sewing machines, in various states of disrepair, while walking through the town and I’m quite sure there were many, many more. While the loss of 650 lives was a drop in the ocean in relation to the massive numbers lost throughout the war, the story of the loss of this village was incredibly difficult to get my head around. I feel I connected with the long-gone residents through our shared reliance on sewing.

A fabric shop

It wasn’t all doom and gloom, though, in my visits to the past.  While at a museum elsewhere in France I was perusing the items held celebrating the end of World War 2 and came across this:

Victory dress!

The caption accompanying this dress states: “Teenage girl’s dress, make for the Liberation out of scarves printed with reproductions of portraits of the Allied heads of state.” I love that someone made a dress to celebrate the liberation of France – makes the dresses I make to celebrate my birthday or other such occasions so trivial – and that it lives on for us all to see.  It’s a pretty awesome dress style too!

And finally for today, I’ll finish up with a dress I made for myself to wear while travelling around.

The dress

Okay, so you can’t really see it too well in this pic, but it’s the best I have of me actually wearing it overseas.  The reason this dress is so special to me and our trip is not because it’s made of brightly coloured seersucker, or even that it’s made from a 1959 pattern.  It’s that I wore this amazing dress to the craziest music festival I’ve ever been to.  It was in Spain. It was in a dessert. It was insane.  And I can guarantee I was the only person there wearing a 1950s dress. I was actually one of the only people I saw there even wearing a dress.  Retro represent! Anyway, I don’t have any photos of me at the festival at all, but I do have this photo to show you just how insane the festival was.

Creepy trolls and devil woman – all par for the course at Monegros Desert Festival

Actually, this photo doesn’t do the craziness any justice.  But you kind of get the idea, no?


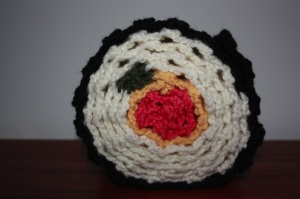
Let me see your sushi roll*

While trawling through the interwebs a while back I came across the most genius idea for a scarf ever.  Ever!  A sushi roll scarf.  Of course I immediately wanted to make it and got to thinking who I could make it for.  My sister-in-law came to mind because; a) she would really appreciate something kitschy like this, and b) her birthday was coming up.  This is how my sushi roll scarf came to be.

Sushi roll

Scarf

Sushi roll

Scarf

How awesome is it?  I love it, and it was a big hit on the weekend when I gave it to the birthday girl.  It ends up being a very long scarf, but this is apparently a handy tool in the cooler months when trying to lure an attractive lad or lass into your proximity, or so the young people tell me…

I love the scarf, and am trying to think of other cool, cylindrical items that would be great in scarf form – I’m yet to come up with anything so if you have any ideas I’d love to hear them.  If you’d like a sushi scarf to call your own, I found the pattern here.

*To be sung to the tune of Let Me See Your Tootsie Roll by the 69 Boyz.  Every time I worked on this scarf I had this infernal song in my head, just with the word ‘sushi’ instead of ‘tootsie’.  Hopefully now you’re in the same hell I’ve been in for weeks.

With Glamour and the Woman’s Budget

That is the tagline for Woman Magazine from 1953…could almost be the the tagline for any ‘woman’s interest’ magazine from today – apparently, not much changes (except women’s body shape but more about that another day!).  Anyway, this is a magazine I picked up on a recent trip to Daylesford and a huge vintage warehouse-type place called The Mill Markets – if you’re in the area, and love vintage you should check it out.  There’s a huge variety of items available from jewellery and clothing, to furniture and porcelain – and many others besides. 

I thought some of you might be interested in the contents of the magazine.  I’ll start you off with some drool-worthy dresses.

Let me know if you need the goss on Ava Gardner's life story, okay?

I love this dreamy dress – I might need to make myself one for next Spring.  It’s the perfect Spring sun-dress for floating around gardens in, don’t you think?

I want them all!

How brilliant is this collection of dresses?  I think I could use at least one of each in my wardrobe.  I particularly like the purple dress on the right.

Colourful Seersuckers, indeed!

I really wish I could find seersucker as colourful as this nowadays.  I reckon I’d rock the green version!

Well, that’s enough staring dolefully at dresses for me for now – time to go and make some of my own.  I’ve a few more gems from the magazine to share soon, so keep an eye out if you’re keen to see more.

Nemesis thwarted

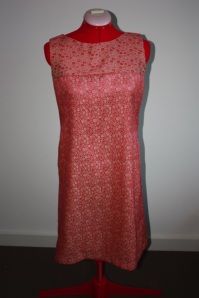
Finally!  It’s done!  The pink dress of doom is no longer a dress of doom but now a dress of va-va-voom!  Or almost, anyway…

Finally...the finished product!

So what if it doesn’t look much like what it was supposed to?  It’s way better than what it was.  Check both out here (if you dare).

After spending way too long with my seam-ripper taking it all apart, re-sewing it, taking it apart again, (rinse, lather, repeat) I finally decided on a course of action which was to take the top part of the bodice from my best-fitting dress pattern and adjust it to fit the remainder of the dress.  It was such a simple solution, I’m kicking myself that I didn’t think of, and implement, it earlier.  It could have saved me from my current feelings of nausea whenever I see pink.

Bodice, or yoke, with the reversed fabric

I made a quick muslin of the bodice to ensure that it would work the way I (eventually) envisaged, and when that seemed to fit the bill, I turned the muslin into the lining.

Op-shopped bed linen for lining

I had to bring the side seams in rather a lot – 60s style straight shifts look awful on me! Who do they suit? – and reattach the zipper for the 40th time, but once that was done (by hand) the dress was finally complete.  Hurrah!  I’ll get a photo of me wearing it soon – it’s way too cold here at the moment for me to even consider getting in and out of clothing for the sake of showing off!

And keeping with my promise to myself that once I’d finished a UFO that I could make something from scratch I whipped up another version of my favourite dress (check out the others here and here).

Simplicity 4744

I’ve already made two other versions of this, however, each are slightly different from the others.  With this most current version, I omitted the pleats right on the sides and it ended up having a sleeker, more sophisticated skirt shape, being more fitted around the hips, rather the usual flare.

Isn't the fabric dreamy?

As I’ve made this dress a couple of times already it went together like a dream, and took only a few hours (including hand sewing the hem, and hand-picking the zipper).  I love those patterns that fit, and just work so easily.  I need to get more of those into my repertoire.  In the mean time, I’ve a couple more projects on the go, and a few more finished ones that I’m loving at the moment, but at the moment I’m so relieved that the Dress of Doom is off my sewing table, I’ll leave the updates there.

Bits and pieces

So, once again it’s been forever since I posted and while I’ve been a little slack in the crafty realm, it hasn’t been complete slackness.  I’ve made a few gifts for some little people in my life.  Some friends recently had a baby girl and I really wanted to make her a small gift.  This turned into a sort of gift-making domino effect (as you’ll soon see).  I decided to make some gorgeous little shoes from Pip Lincolne’s book, Meet Me At Mikes.

I was given this book a couple of years ago, when I was just a fledgling sewist.  I love the little projects in the book and I’ve made quite a lot of them.  They’re not difficult and the instructions are very simple and clear and include really important steps such as ‘make yourself a cup of tea’ which I really appreciate and believe are necessary.  Pip also has a great blog – you should check it out.  Anyway, enough gushing – onto the shoes!

Aren’t they gorgeous and tiny?!

Once I’d completed the shoes, I realised that baby girl’s brother was about to turn two (domino effect begins) and I couldn’t post a gift to the new addition without a birthday gift for the little man, so I made him a mini pair of pyjama pants.

While the fabric part of this project was taken care of (leftovers from PJ pants for Dajarra a while ago) I had no pattern and no idea how small two year old children are.  Luckily I work with someone who has a two year old boy of their own and I asked to borrow a pair of his pyjama pants to make a pattern.  I couldn’t very well borrow his pants to make another boy some pants without making him some of his own, so enter the final part of the domino effect.  Pyjama pants #2.

I love this fabric – retro computer critters (I have no idea what they’re really called…or if they even have a name).  For some reason, while I can usually take-or-leave small children, I really love making things for them.

Onto project(s) #2.  I recently taught myself to crochet.  We’re travelling for a few months later on in the year and I couldn’t bear the thought of being craft-free while travelling, and while I can’t haul my sewing machine around Europe, I knew there would be something out there that would satisfy my crafty needs.  My  mind turned to crochet.  I became a little bit obsessed, even if my first attempts weren’t always successful.  Check these babies out:

They were supposed to be the beginnings to granny squares, but my counting always seemed off (Dajarra has helpfully suggested they could be crocheted nipple tassels…).  I couldn’t figure out how as I can usually successfully count within the single figures and it turns out I just wasn’t pulling them out enough – you can be rough with yarn!  Anyway, I finally got my head around it and have started a granny square blanket.

How ’70s is it looking?!  I have no idea to what purpose I’ll put it to, but I’m enjoying the process and crocheting these squares is a really lovely way to relax in front of the telly before heading to bed for the evening.  My new found love of crocheting led to my next ‘me-made’ gift; a scarf for a dear friend.  After scouring YouTube for someone who could teach me (via pre-recorded video) how to make a lovely scarf I found The Stingy Stitcher‘s Infinity Scarf.  It’s a great stitch and very easy to do once you get going.

I’m a bit of a slow learner, so after a few false starts (great thing about crocheting is that if you mess up you can easily pull it out again, unlike sewing where hours of getting-to-know-you time with a seam ripper is usually in order) I finally got on a roll and finished it up this week.

And here’s the always gorgeous Dajarra modelling it for us:

I usually don’t post gifts on here until they’ve been received, but I know she won’t read this so it’s okay this time around.  I hope she likes it!

And, finally, the dreaded pink dress I posted about last time.  I stated that I wouldn’t start a new project until I’d fixed it – I still haven’t finished it, but I keep telling myself that I haven’t cheated in my pledge to myself because I haven’t sewn any new items for myself.  That’s totally not cheating, right?  Right?  Anyway, I finally got sick of not being able to make any more new stuff for me, so after a few unsuccessful attempts at fixing it easily, I’ve come up with a new tack and should (hopefully) have the new and improved dress ready to show you soon.